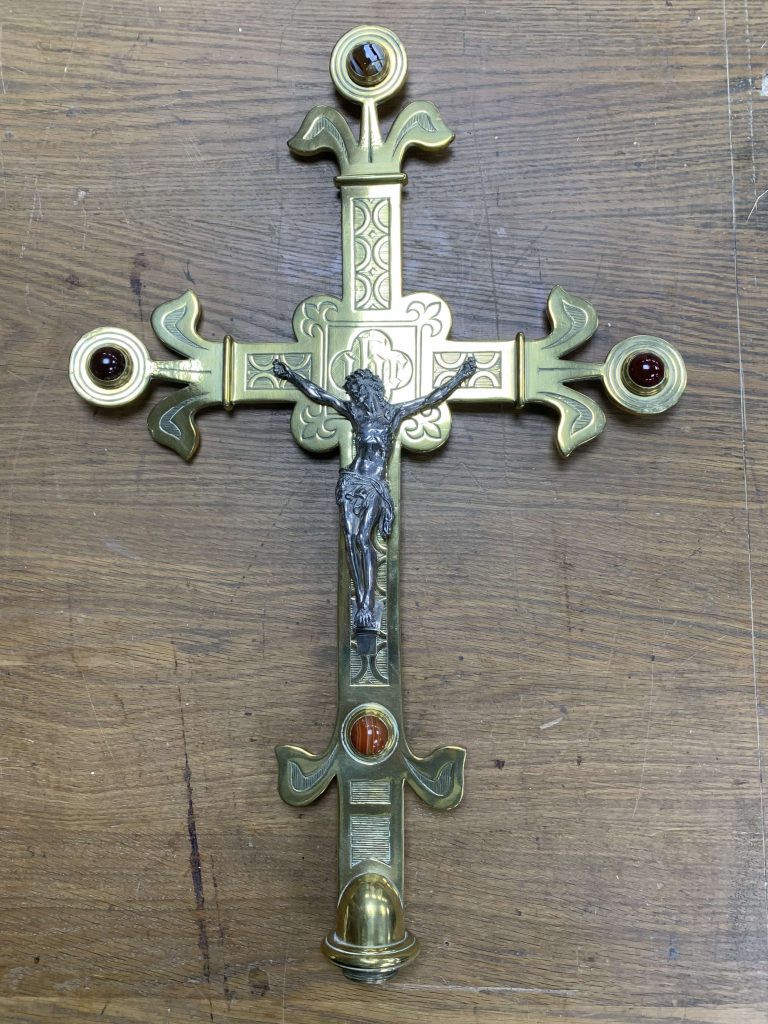
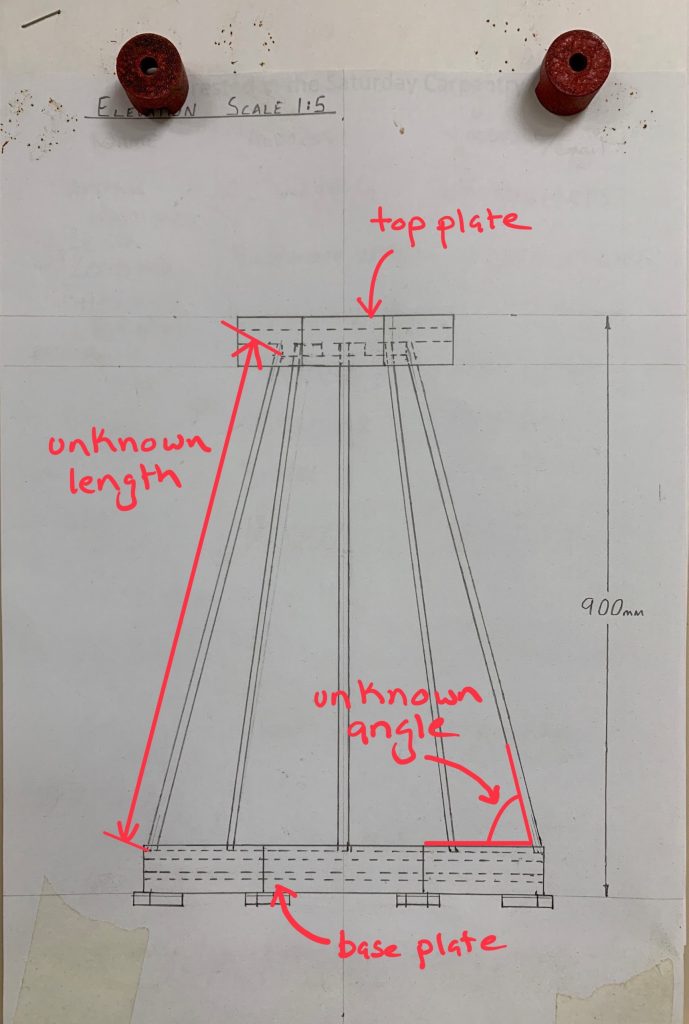
Our workshop has a number ‘inherited’ projects. One of these is a processional cross (pictured) that needs a stand. For this we have an incomplete set of design drawings. Already constructed are the base and top plates and we have material for the stays. Here is one of the drawings that we have. It has been annotated to show a couple of difficulties that we need to solve.
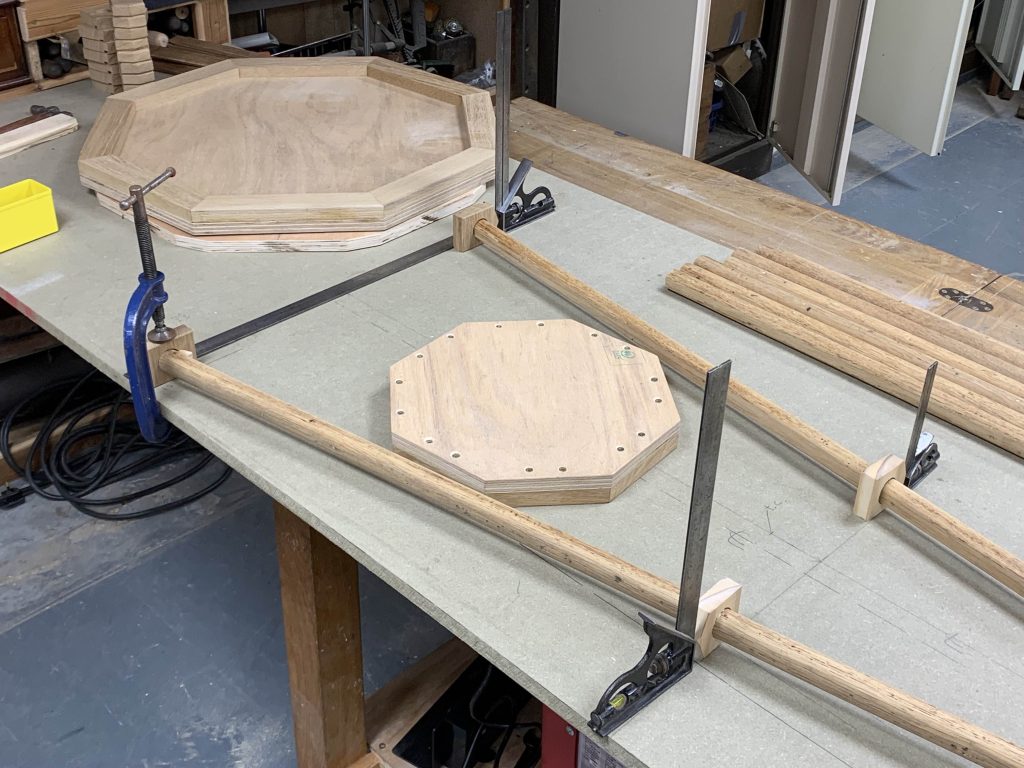
One method of solving the length and angle question is by drawing an accurate full size layout of the components on a board and measure angles and lengths. It is a very traditional method of resolving such problems.
You can see the layout lines that we’ve drawn on the board. The combination squares help fix vertical dimensions.
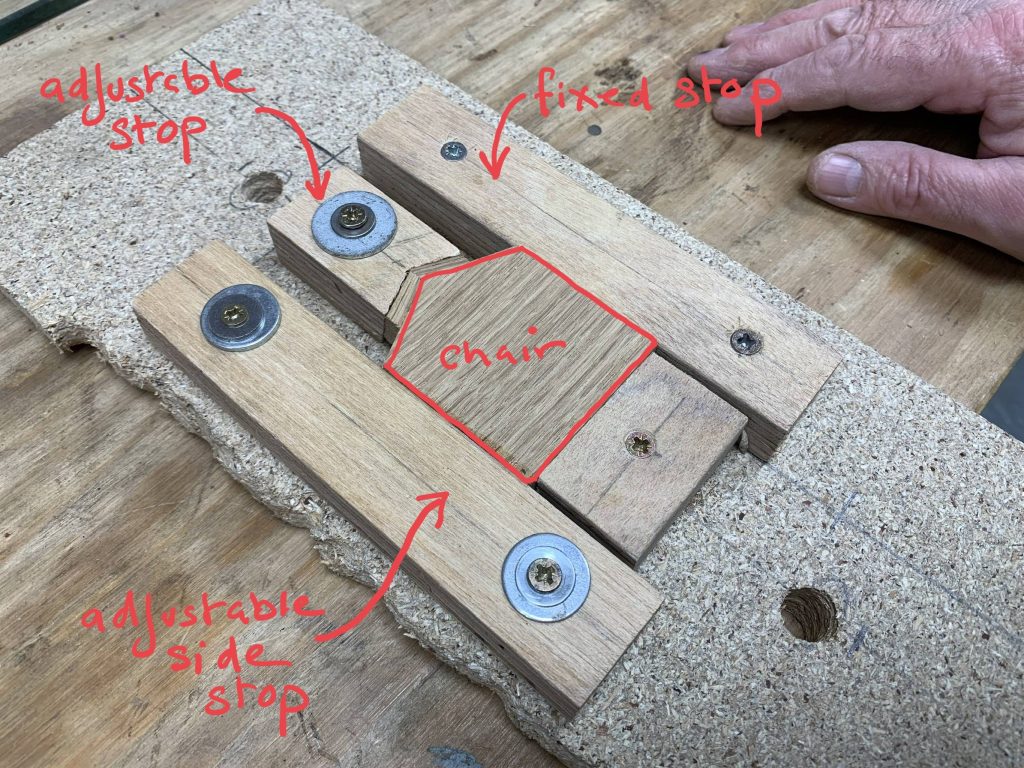
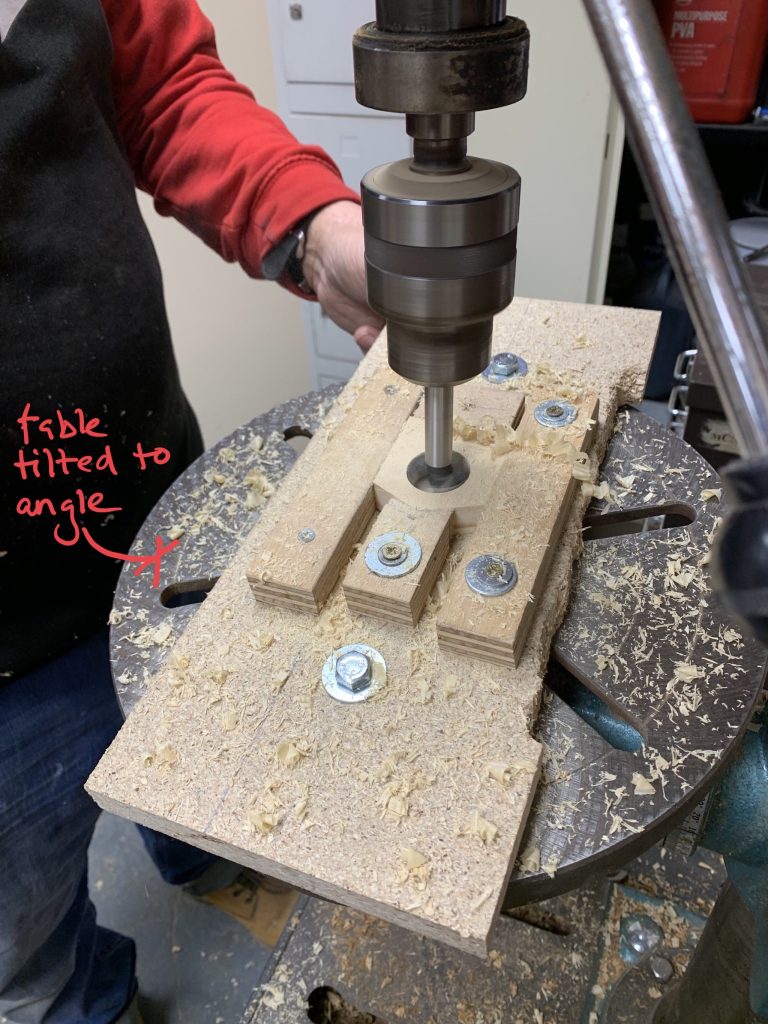
Once we worked out our angles we needed to have a drilling method that would allow us to cut consistent pocket angles in each and every chair.
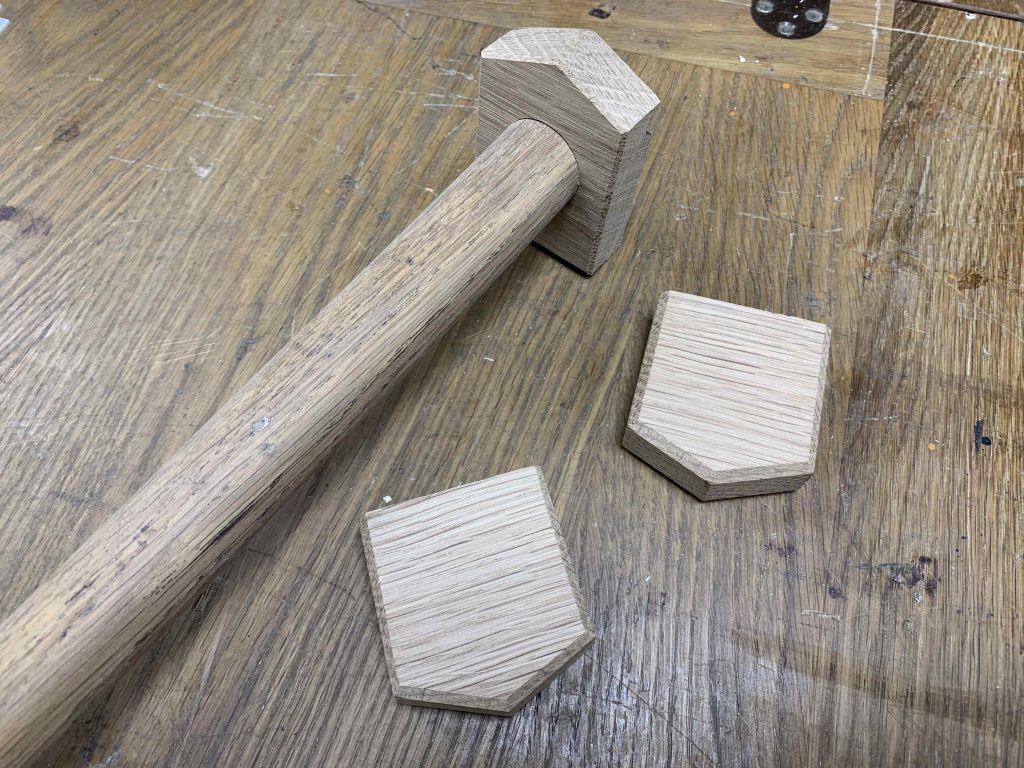
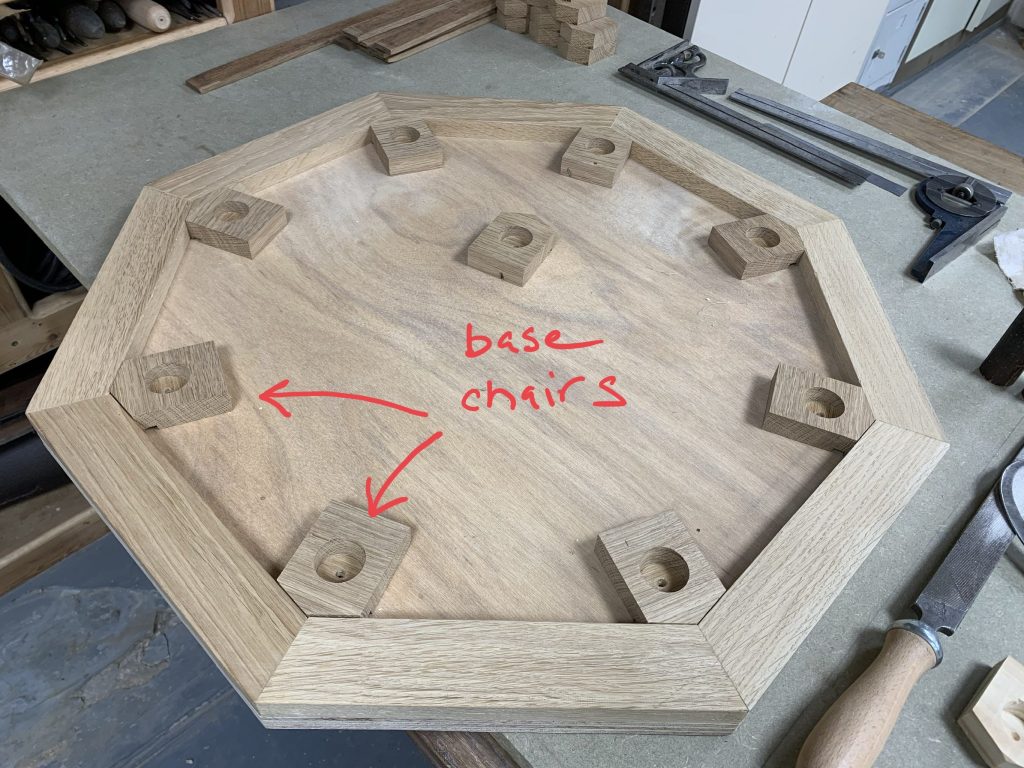
These house like shapes are the ‘chairs’ that will have the angled holes. To the left of the picture is a stay with chair in place.
To cut the chair pockets we made a holding jig from scrap that mounted onto the tilting table of the drill.
To help us get the holes in the right place some of the stops of the jig were adjustable. To make the adjustable side stops work the holes through the stop were larger than the screw diameter. The screw was then inserted through an oversized washer which would clamp down the side stop once aligned. Perhaps not the most elegant solution but it worked nevertheless.
And here we have the chairs temporarily in place. When we’ve completed the corresponding chairs for the top plate we’ll do a dry fix to ensure everything fits.
Much of the timber used comes from timber thrown out during a local church’s refurbishment. It seems quite fitting that this salvaged timber is being used for the processional cross stand.
At some point we’ll probably write more extensively about the cross.
And so the project continues.
Your items have been added to your basket.
Your items have been added to your basket.